
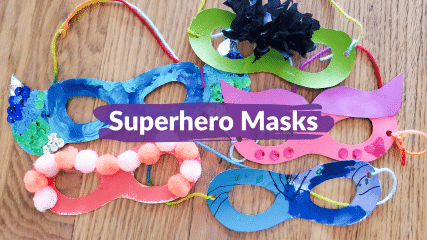
Let’s pretend to be superheroes! We have the instructions for making a mask at home below. Costumes are optional.
We shared this fun activity during our Caped Crusaders and Everyday Heroes exhibition.
Watch the video:
Let’s get started!
Materials:
- Mask stencil (or i.d.e.a. mask template)
- Heavy paper, such as cardstock or poster board
- String
- Scissors
- Hole punch
- Art materials, such as paint, stickers, glue, glitter, markers, sequins or foam sheets
Instructions:
Step 1: Use a mask stencil you have or find one online, such as the mask stencils the museum offered during the superheroes exhibit.
Step 2: Trace your mask stencil on cardstock.
Step 3: Add some details to you mask – if you like.
Step 4: Cut your mask – ask an adult for help with eye holes, if needed.
Step 5: Decorate your mask. Think about your disguise and how you imagine it looking?
Note: Be sure to let glue and paint dry.
Step 6: Poke holes into the sides of your mask – you may need to ask an adult for help.
Step 7: Cut string long enough to go around your head (with extra left over for tying) and thread through the holes.
Step 8: Tie string to complete your mask. Now your are ready to wear your superhero disguise!
Enjoy!